709-218-7927 The Landfall Garden House 60 Canon Bayley Road CANADA A0C 1B0 |
|
|---|
.JPG)
Vermicomposting - Winterizing the Vermicomposter 2010
Wednesday, August 25, 2010
You are wrong!
It is NOT too early to make plans for winterizing the bin.
Here is my plan:
This year the big bin on the balcony was charged with the job of rendering down about 8 large garbage bags that had wintered indoors.
It has done a good job, and as an additional task, has served as host to a few experiments.
Now I want to finish-off the material.
I’ll sieve it and store the fines in plastic shopping bags over winter. Come spring we will see what we will see.
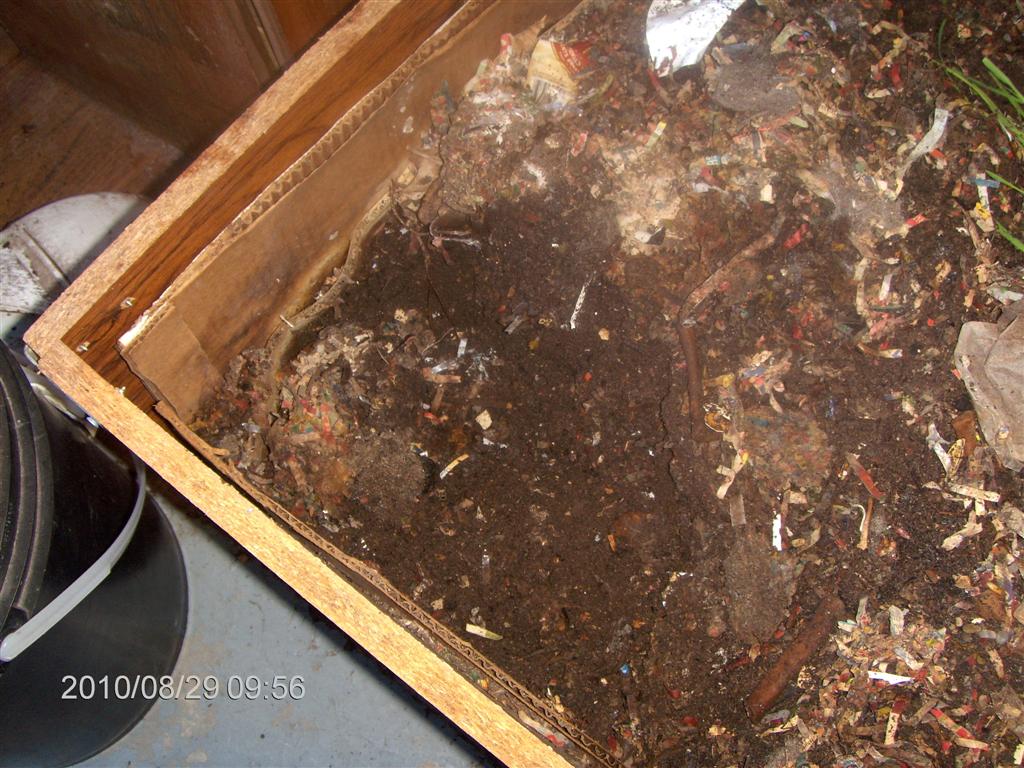
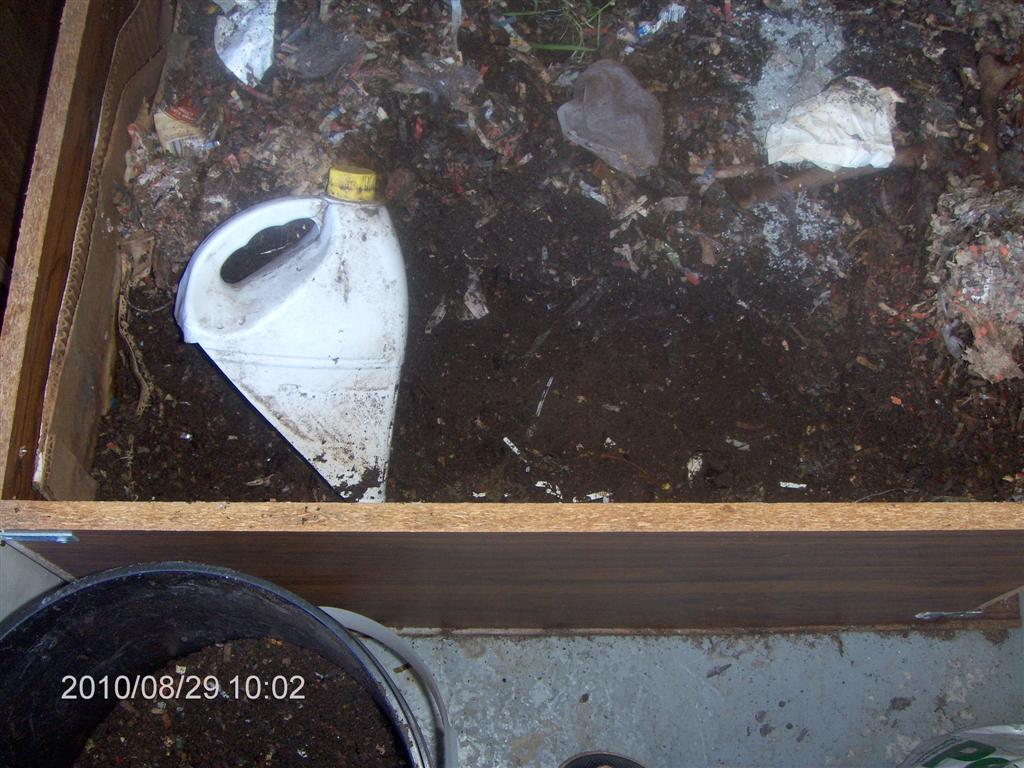
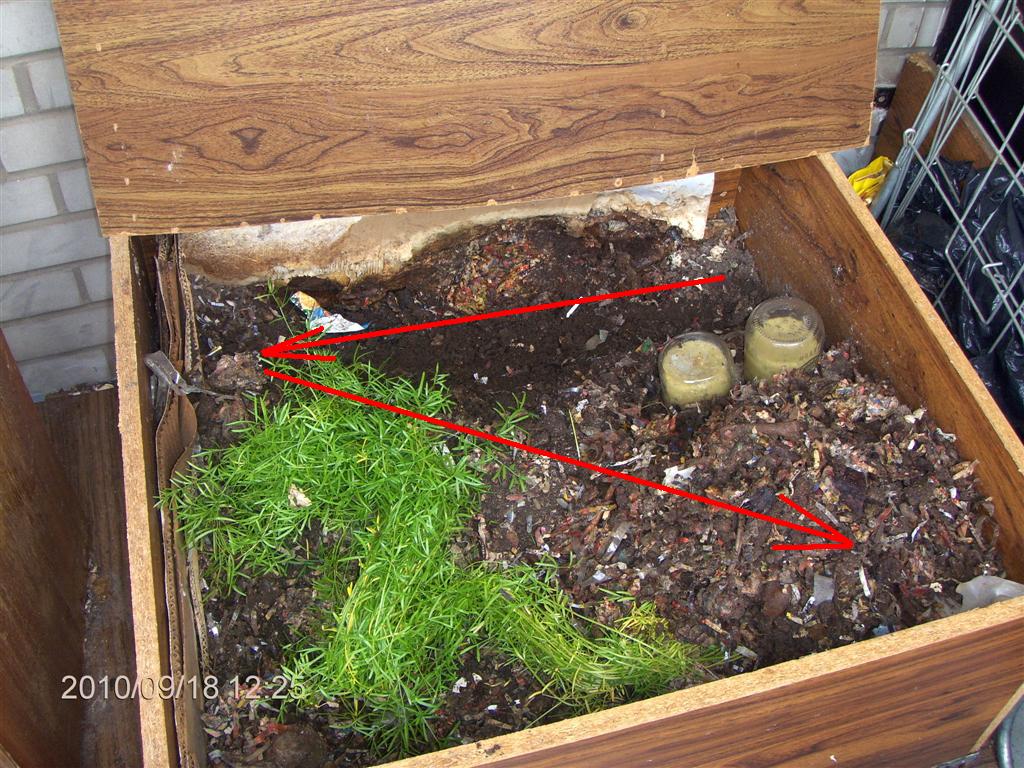
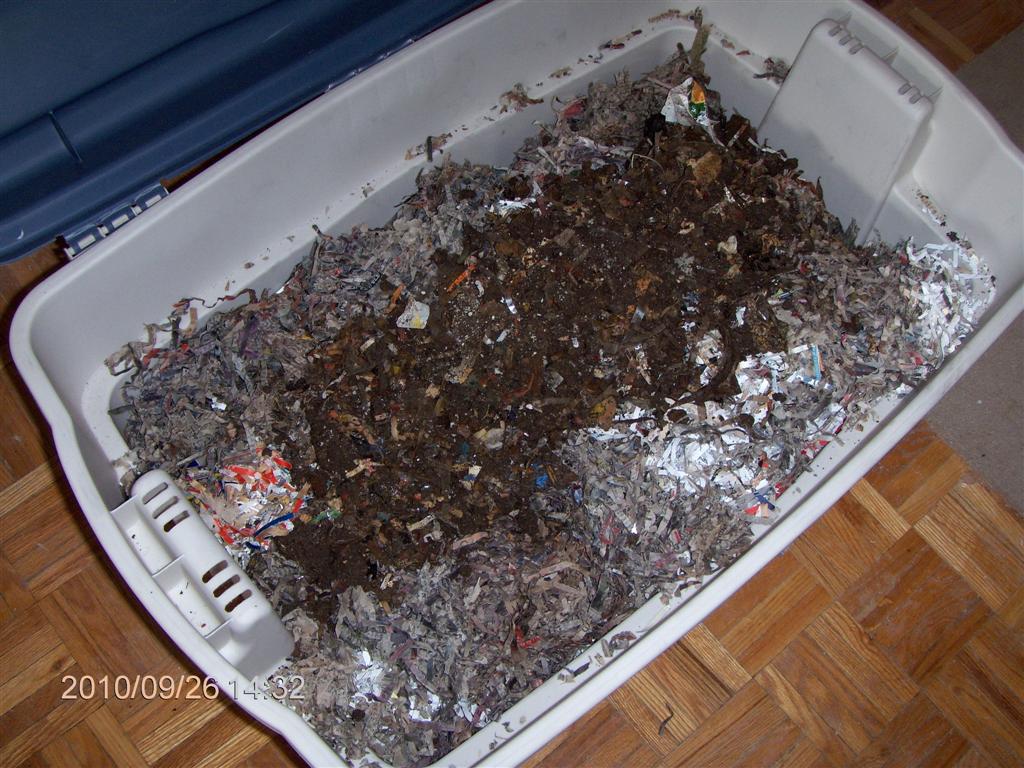
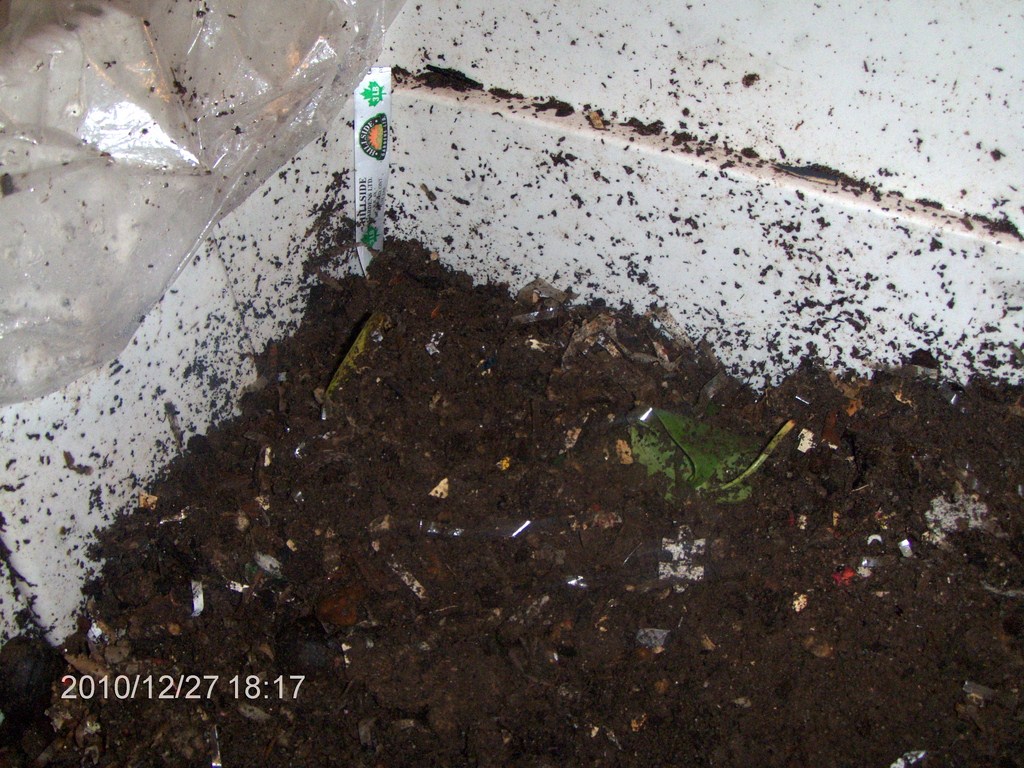
Here is a corner of the bin, scooped out.
The top layer is dry, but within an inch of the surface we are seeing lovely crumby material.
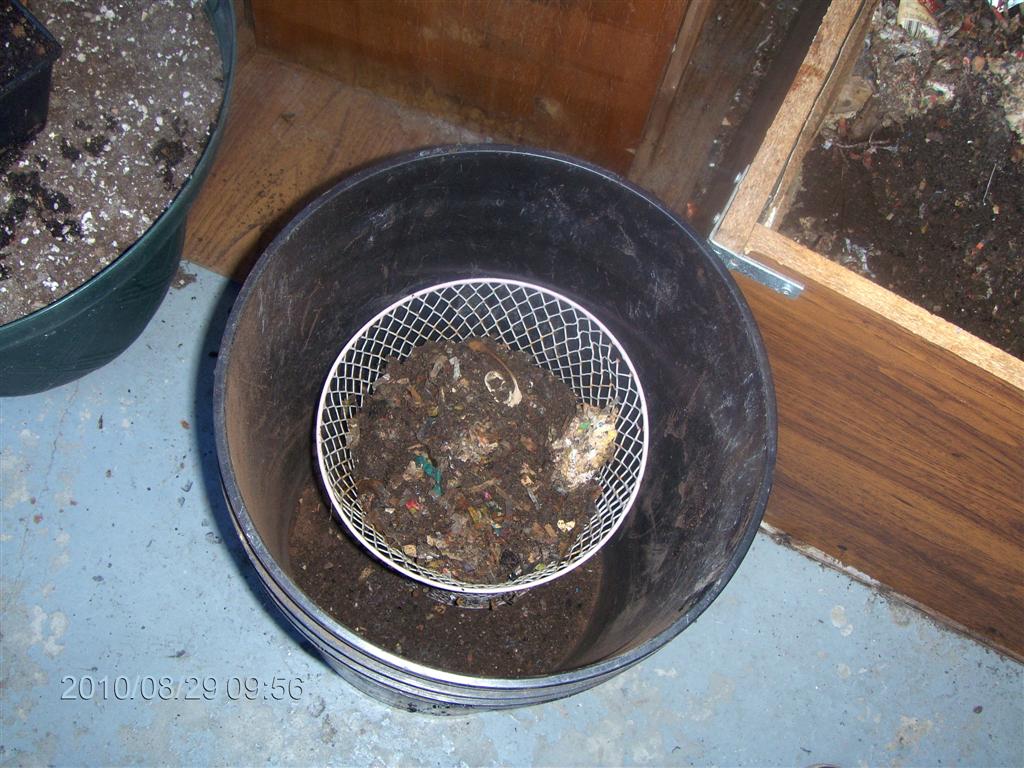
I place several scoops of material into a wire waste basket I picked up at Staples for about two dollars.
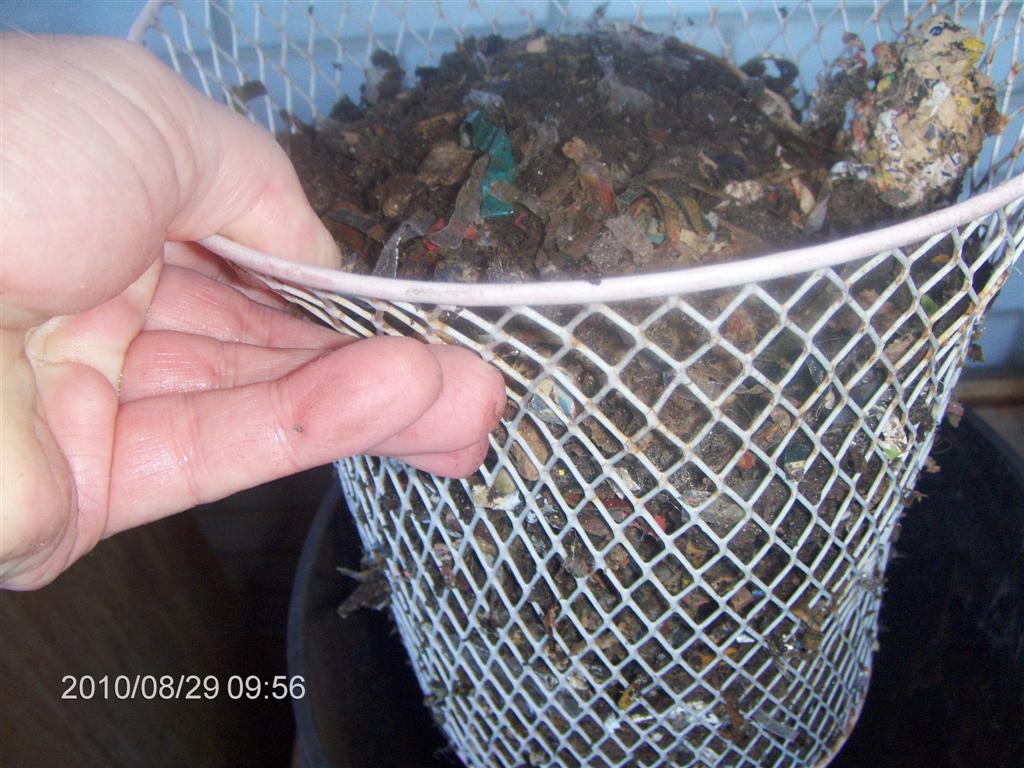
The basket is about eight inches diameter and a foot tall. I can easily hold it with one hand while using the other hand to take a picture.
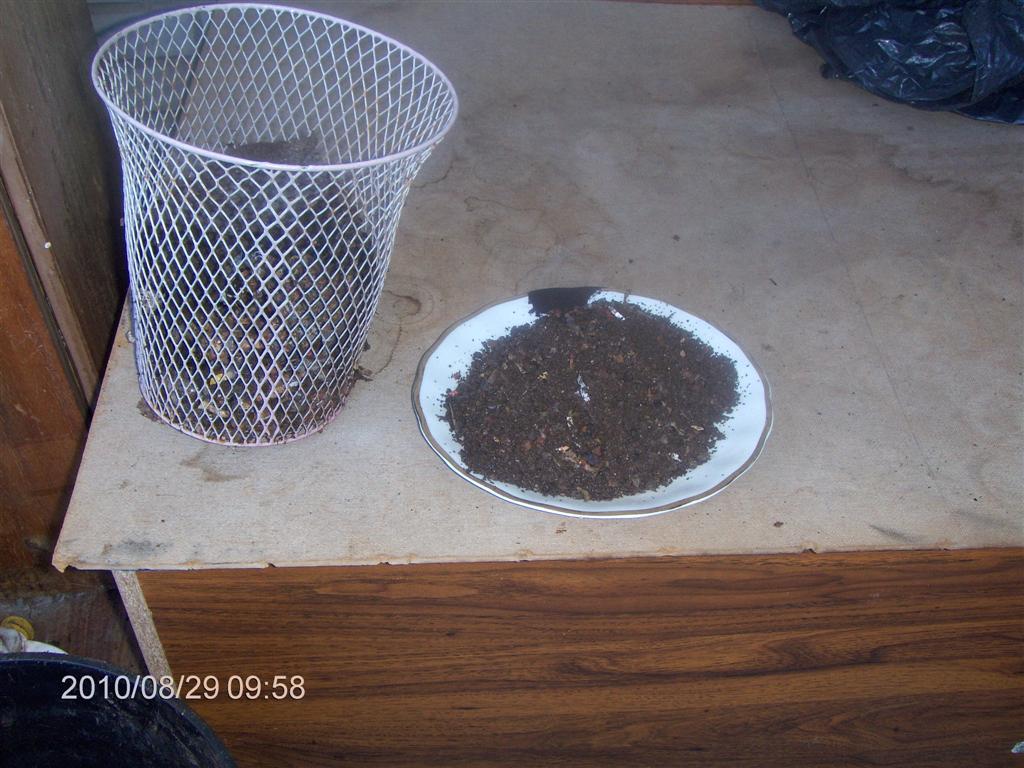
Once the material has been shaken into a 25-liter pail, I am left with fine material, about three times as much as you see on this old dinner plate, left over from an old dinner!
I continue sieving until I’ve opened up quite a trench in the front of the bin. This area will dry out over the next few days, and the worms will start their retreat to the back end of the bin.
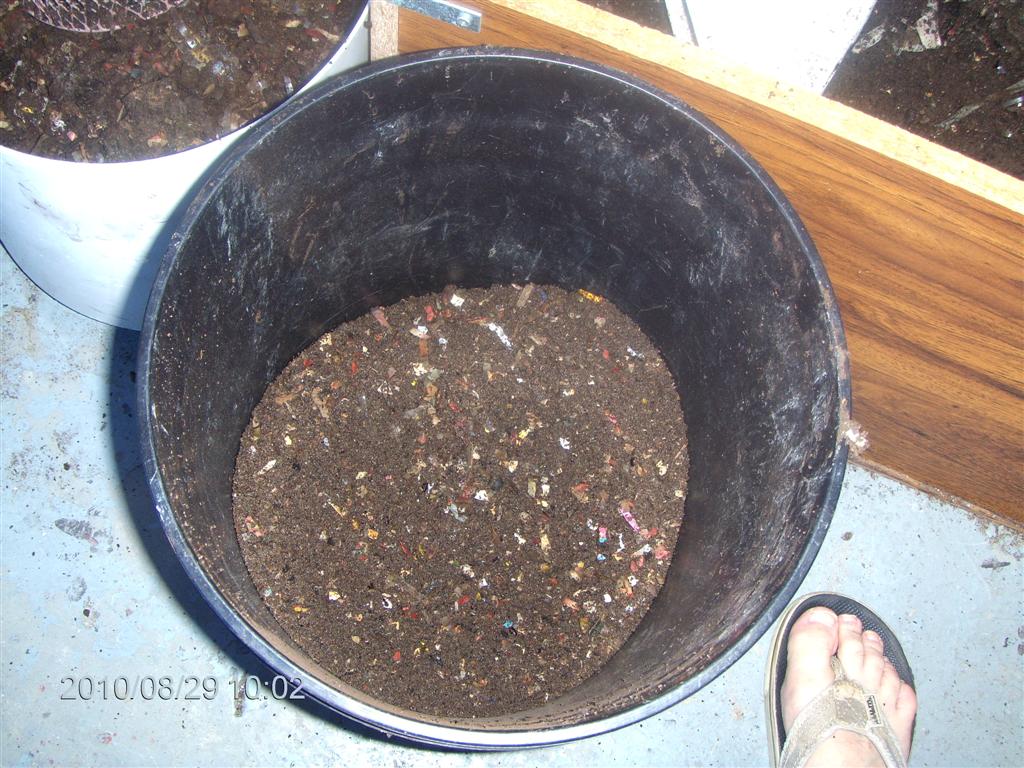
Here is the fine material in the pail.
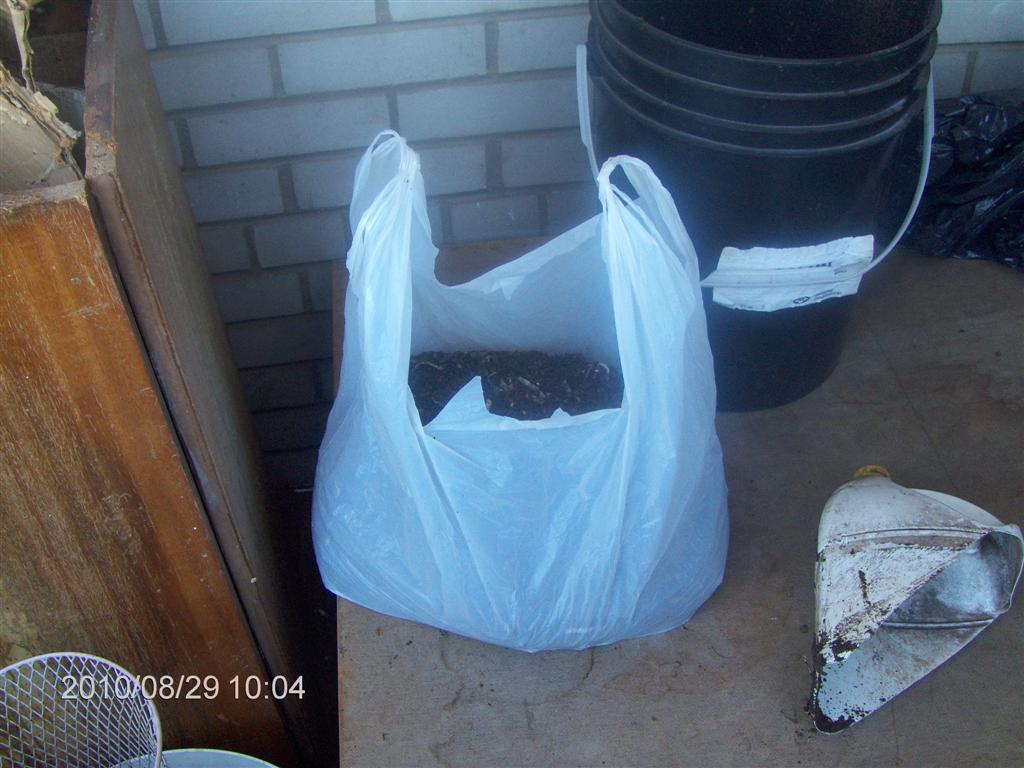
I tip the fine material into a plastic shopping bag.
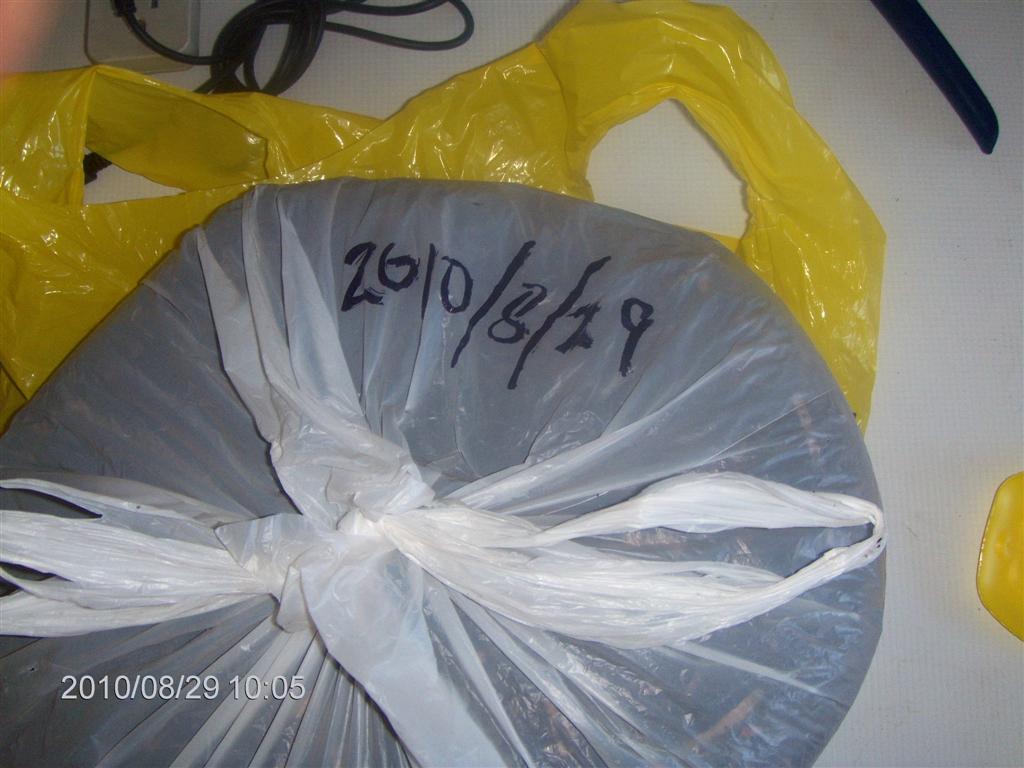
I write the date on the bag, and since plastic shopping bags ALWAYS have a hole somewhere, I double-bag it.
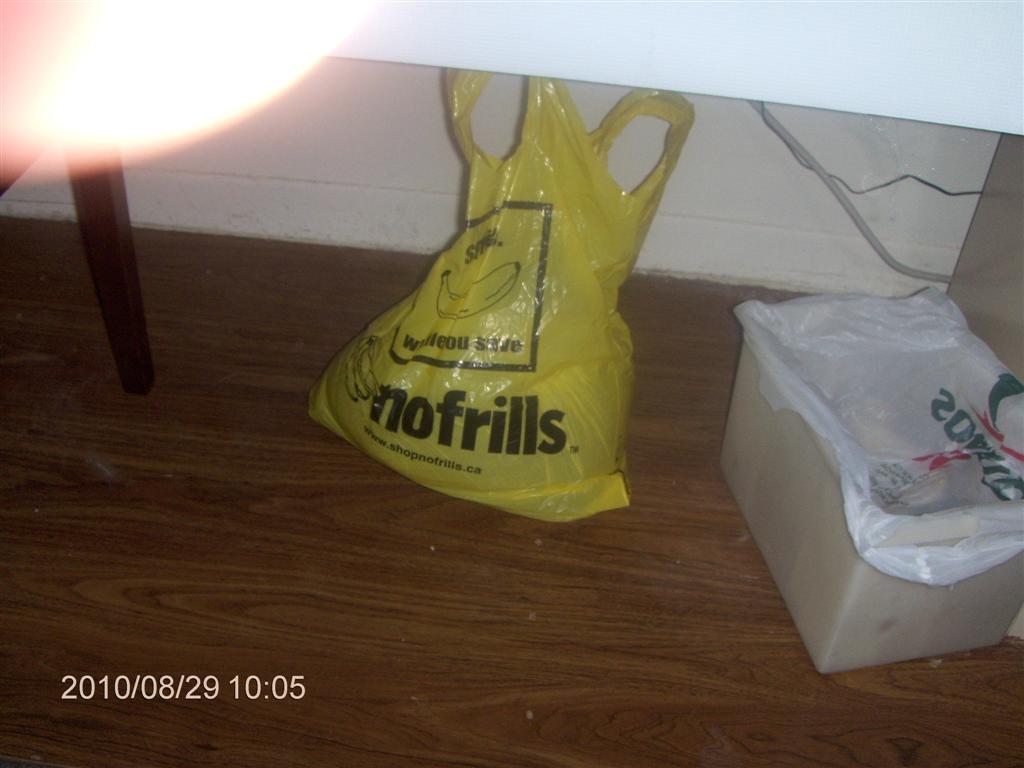
Here it is, parked under the other workbench.
Sunday, September 05, 2010
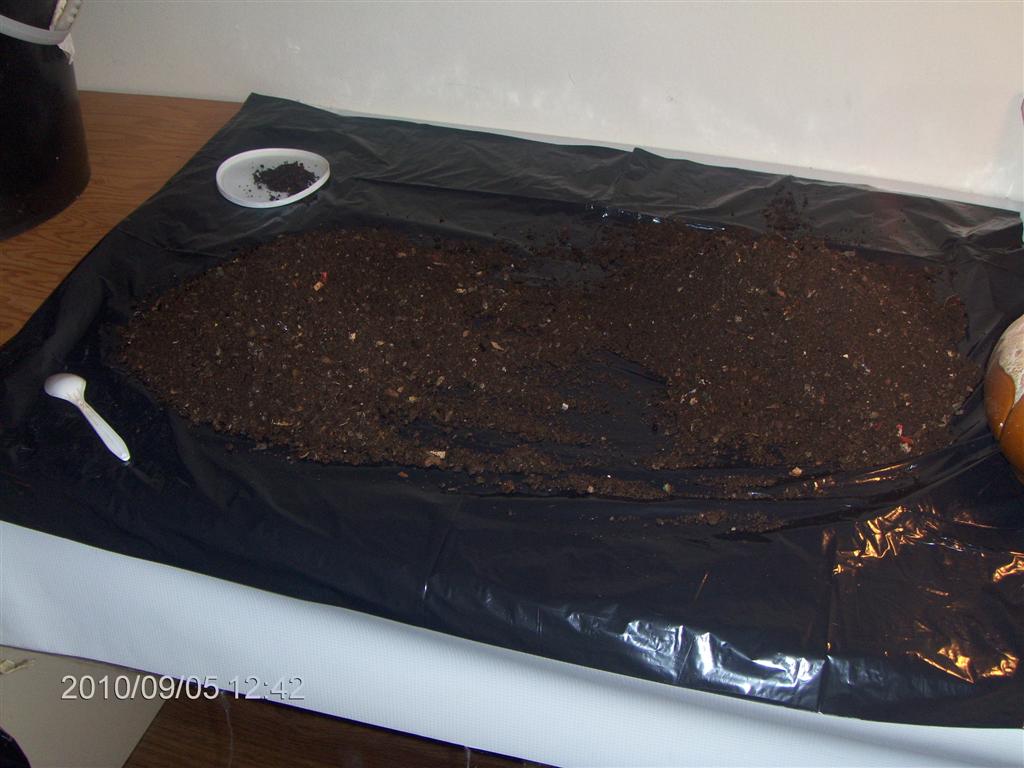
I needed some worms for a separator project, so I tipped my bag of material onto a 67-liter garbage bag and used a plastic teaspoon to move the material heap bit by bit to the left-hand side.
The lamp (off to the right) is to help me see the worms, not to drive them into the pile (worms avoid light).
The margarine lid has a small pile of material-plus-worm stuff. I harvested about a dozen small worms, probably missed a few, but did see about a dozen eggs, so the eggs will hatch and provide fresh worms to continue the end-process of vermicomposting.
Two of the worms had the appearance of being near-dead, almost rigid, and the material is quite dry, so I added a pint of water from a pint jug before re-bagging it.
I should check back in a week or two to see how they are getting on.
Wednesday, September 15, 2010
I separated out another 10 liters or so of material on the weekend, and it sat in a 25-liter pail for a few days.
This afternoon I took 20 minutes to teaspoon through it. Many of the worms were sluggish, the material was dry. I saw a couple of dead worms.
Time to make a worm hospital!
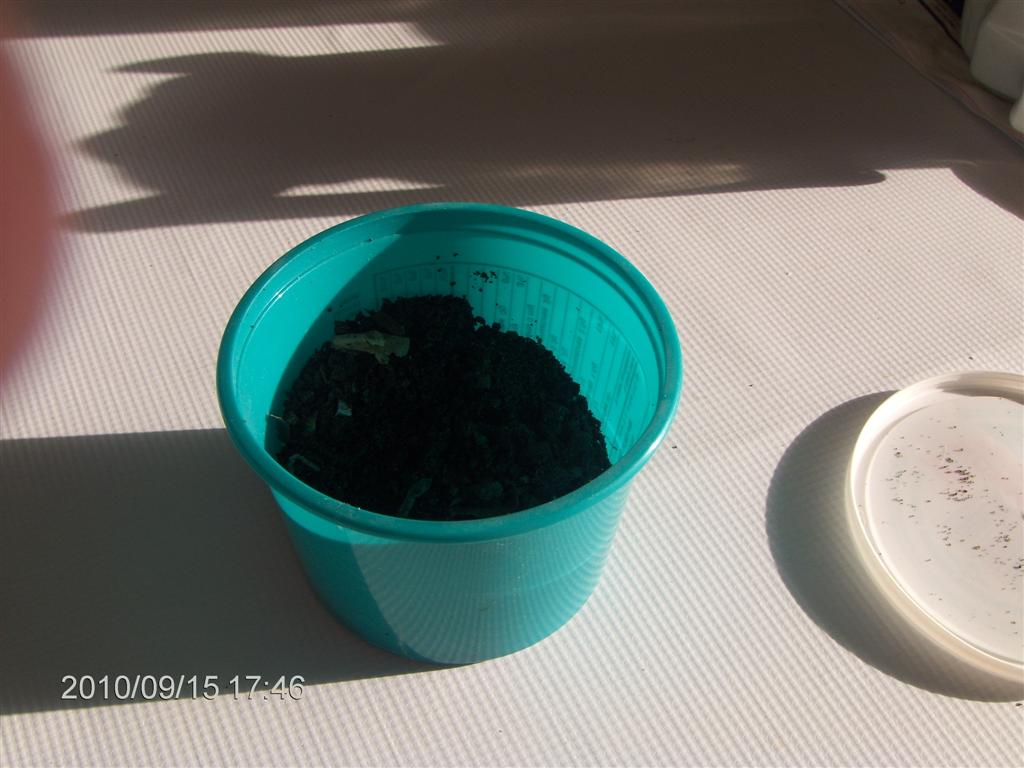
Here are the results of my 20-minutes sorting. I have tea spooned worms plus a small amount of castings/material into a one-pound tub.
The material is dry and the worms are threatening to die.
I add about a half-cup of room-temperature water down the side of the tub; the water pools in the bottom.
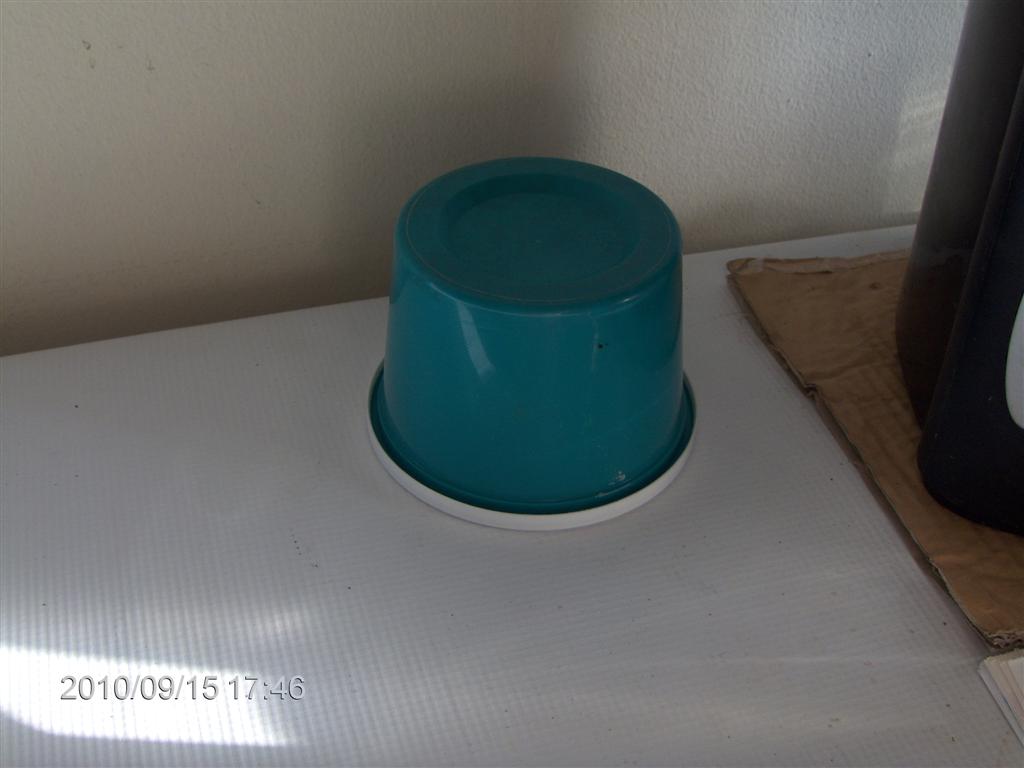
When harvesting is complete, I lid the tub and invert it for half an hour. This causes the water to distribute more evenly through the mix, and ensures that worms which might be too dry to move far get coated with water and hopefully get a fresh grip on life.
Saturday, September 18, 2010
(Ignore the greenery. I lopped the top of a fern-like plant, nasty thing. Drops dead needles every day. I wanted the philodendron which shared the basket with it!)
I continue to work my way around the bin.
This morning I scooped a layer from the NW corner of the bin. The trench runs from the NE to the NW corner.
I sieve the material and take the fines inside to harvest the worms (if I need them) and the castings material is stored in bags.
The coarse material gets dumped at the “back end” of the trench, which right now is the SE corner, just below the section that holds a couple more soup experiments .
The next time I harvest, I’ll be scooping material from the left hand side (NW towards the SW corner) and tossing the coarse material along the right-hand side (SE to NE corner).
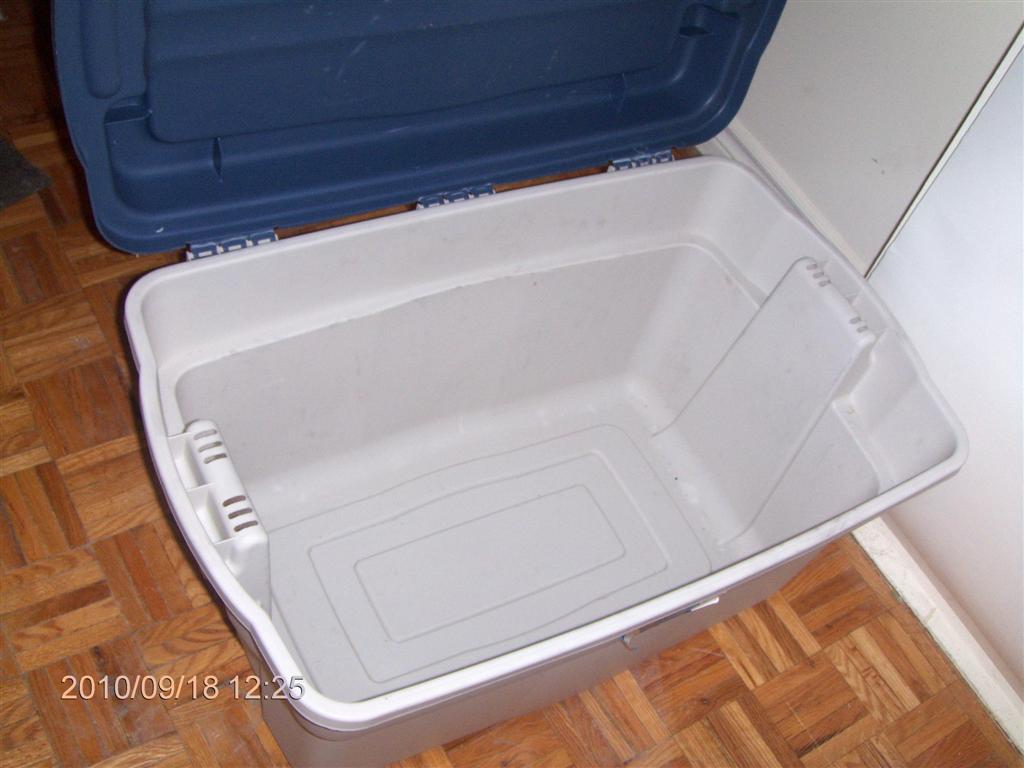
The next time I have a garbage bag of shredded paper, it goes into this large plastic bin.
The bin measures about 30” by 18” and 15” deep, and has a lid.
(Sunday, September 19, 2010 I had the foresight to weigh the bin: seven pounds when empty)
I’ll add a few quarts of water and then cover the paper with a clear plastic dry-cleaning bag, leaving the bin lid wide open. Moisture will condense on the underside of the bag and drip back onto the paper until the moisture is evenly distributed.
That settled, I’ll dump my coarse material (after sieving) into this bin to initiate a fresh colony of bacteria, baby worms, and eggs.
The theory is that by early spring I’ll have a rich and plump colony of worms to jumpstart the Kitty-litter bags .
NOTE WELL: Whenever you are starting a new bin with paper, water and raw material, allow a couple of weeks for the heat to die down.
Heat? Yes. Regular composting is exothermic, it gives off heat, and the heat at the start of a pile while not enough to destroy pathogenic organisms and undesirable weed seeds is more than enough to kill or annoy your worms.
Sunday, September 26, 2010
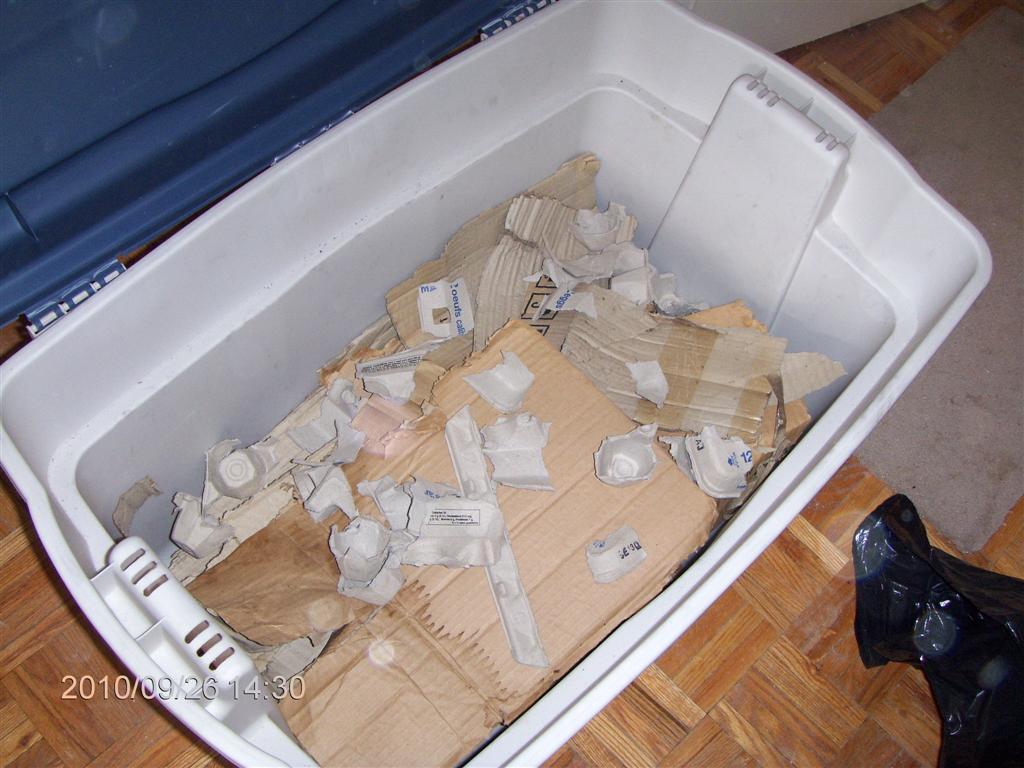
I grabbed some ragged pieces of corrugated cardboard, once lined the outdoor bin. Torn into ten-inch squares they form a base. Plenty of air, plenty of canyons, plenty of glue for the worms/bacteria.
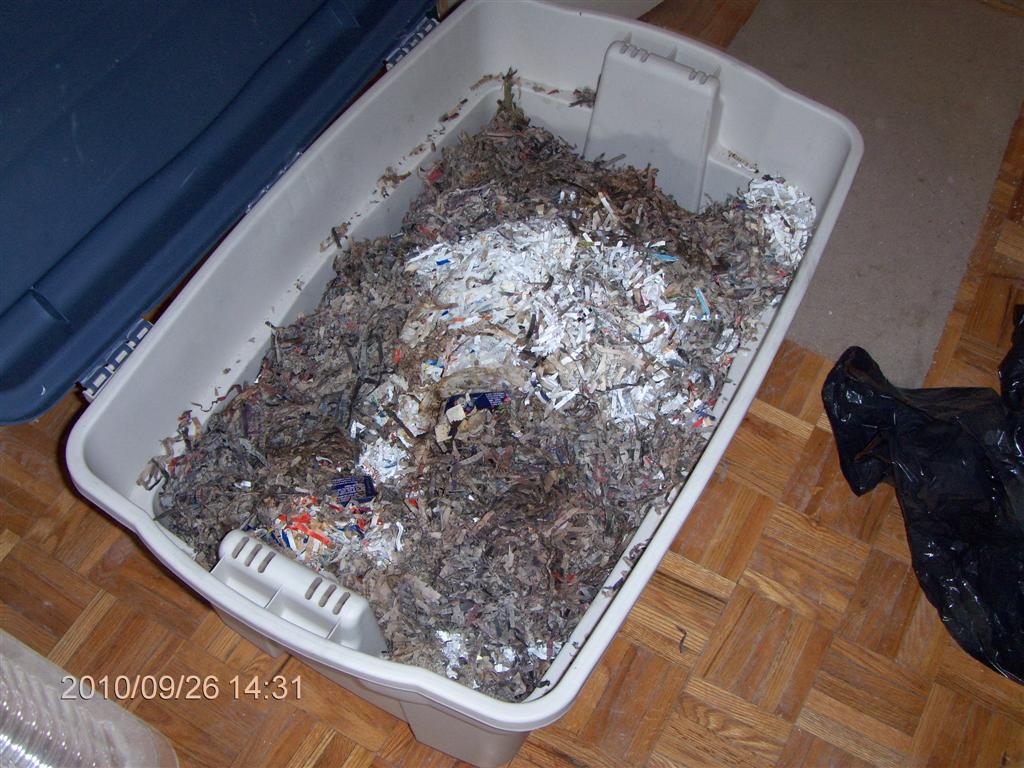
I tip in a garbage bag of shredded paper. The bag has been sitting in a tall carton, receiving several shredder bins of shredded paper. I toss into it the odd tea bag, the cold dregs of tea from last night etc, so at the base of the bag the shredded paper is a tad damp.
When I up-end the bag, the damp stuff is on top, the dry stuff underneath, and below that, my corrugated cardboard squares.
Is the paper damp enough? No, but read on, dear vermicomposter, read on.

Here is about a gallon of coarse material from today’s sieving effort. I can bet there are at least two worms in there, also some eggs, but this is not a primary source of worms; this is a source of bacteria.
The damp paper and the bacteria-primed soil/castings will start a new colony of bacteria and be ready for the worms when the first really cold snap arrives.
Here is the coarse material spread out thinly along the centre-line of the bin
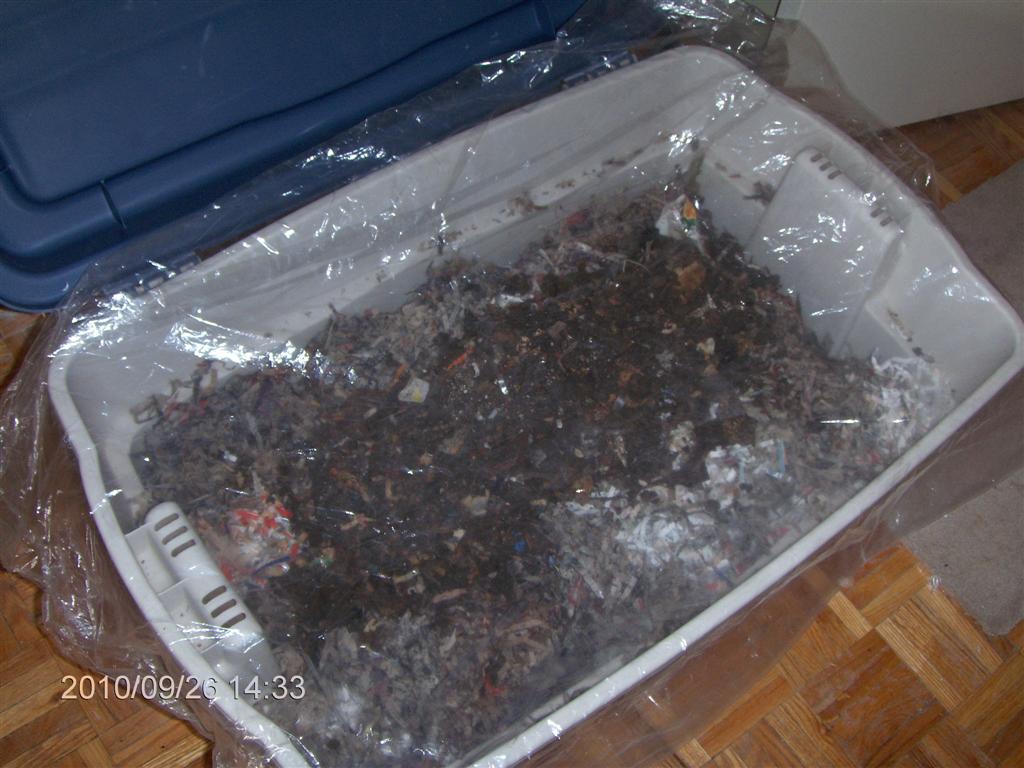
A dry-cleaning bag, clear plastic, is draped across the top of the bin.
Over the next few days, moisture will evaporate from the material (there will be a trifle amount of heat generated) and the moisture will condense on the underside of the bag and drip back into the bedding.
A mini model of our rain system!
I will be able to get a feel for how much moisture is in the bin by the amount of condensation that appears:
No condensation means certainly NOT enough moisture!
Monday, October 11, 2010
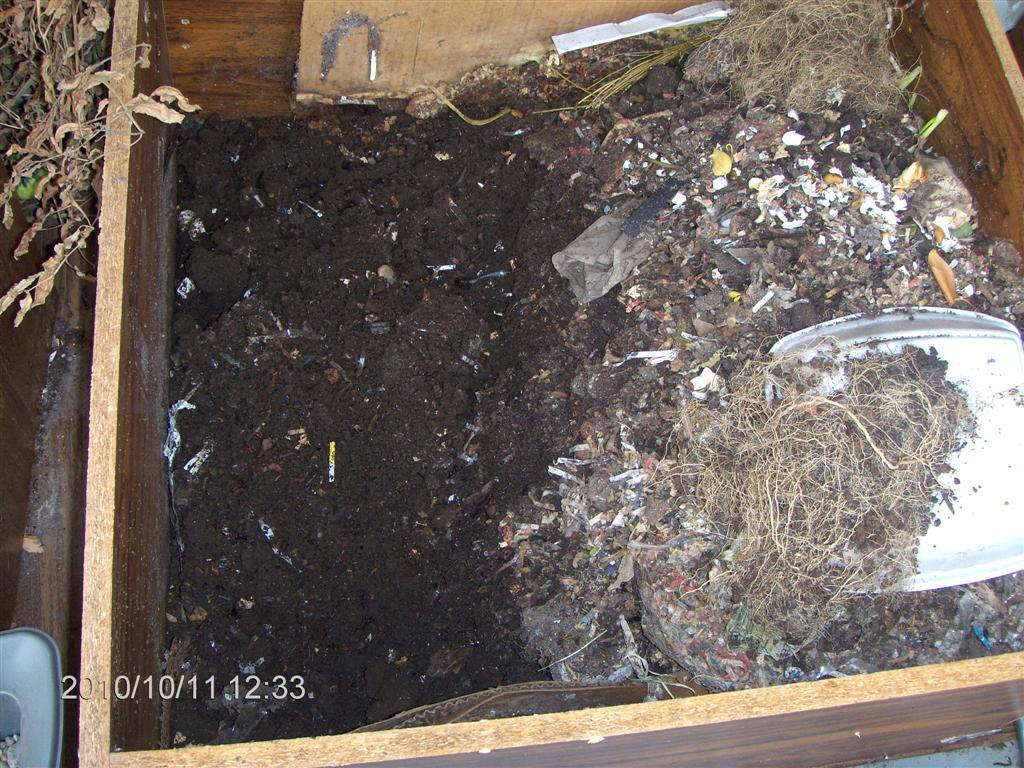
I continue to work my way through the bin.
A complete six-inch layer has been removed from the top by working counter-clockwise around the bin.
The worms retreat to the lower level.
Today I managed to clear the lower six-inch layer on the left-hand side, and have used my pinch-bar to break up some of the semi-solid mud which now lies on the left-hand side drying out a little bit.
The worms from this material will retreat to the right.
In a few more days I will have reduced the bin to a hard-core chunk of material which holds hundreds of worms.
Separating that last lot will empty the bin and provide a large population of worms for the indoor bin.

Of course I bag the castings/fine soil that arises from my sieving process.
From the left:
1: An almost-empty bag of peat moss. I use the peat moss to add fiber to castings mixtures.
2: A full bag of peat moss. The first bag has lasted me for 18 months.
3: A bag of fine soil + castings.
4: A bag of fine soil + castings.
5: A bag of fine soil + castings.
6: A bag of fine soil + castings.
7: A bag of coarse material.
The bags of fine soil hold worm eggs, so leaving them out on the balcony won’t hurt them at all.
The bag of coarse material will be brought indoors and added to the indoor bin, providing bacteria, soil and worms and eggs all at once.
The material will render down over this winter.
Once the outdoor bin is empty and before the weather stays below zero, I can use it to mix the bags of fine soil with the peat moss to make a getter potting mixture.
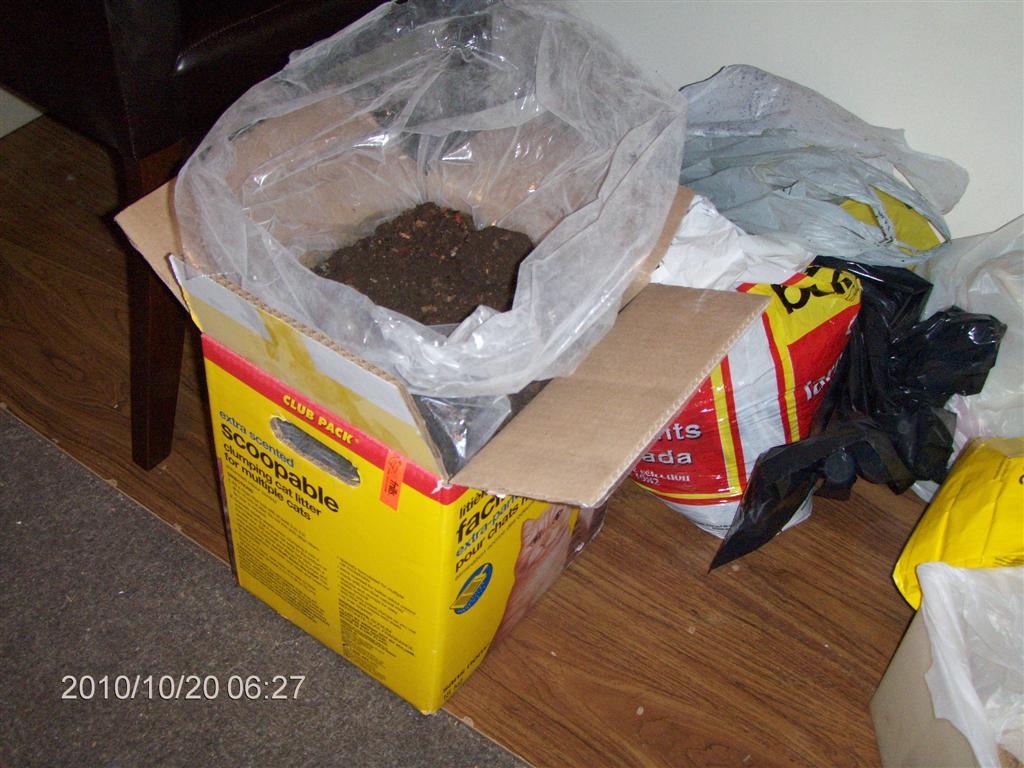
The box in which the kitty-litter arrived makes a great container for harvested castings. Strong box, strong plastic bag … A Second Use For Everything.
Saturday, October 30, 2010
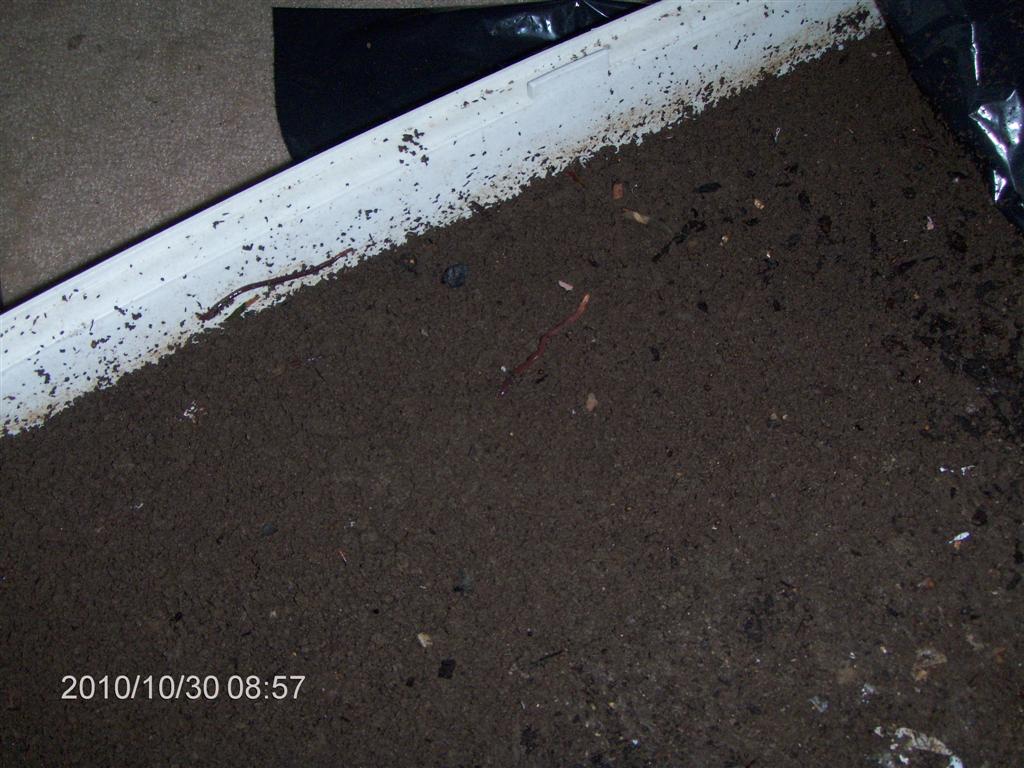
The old hamster cage tray sat outside all summer long, on the NE balcony, protected from the hot direct sunlight.
It was covered with a variety of planks, and on those were placed houseplants. Excess water from the plants drained into the tray and kept the worms happy.
I brought the tray inside two weeks ago, covered the soil with a black plastic bag, leaving about two inches of air-space at both ends, and covered that with a sheet of cardboard to inhibit investigations by my two cats.
Alfie worm can be seen crawling along the inside, while Bertie worm is showing off his pale tip just to the right.
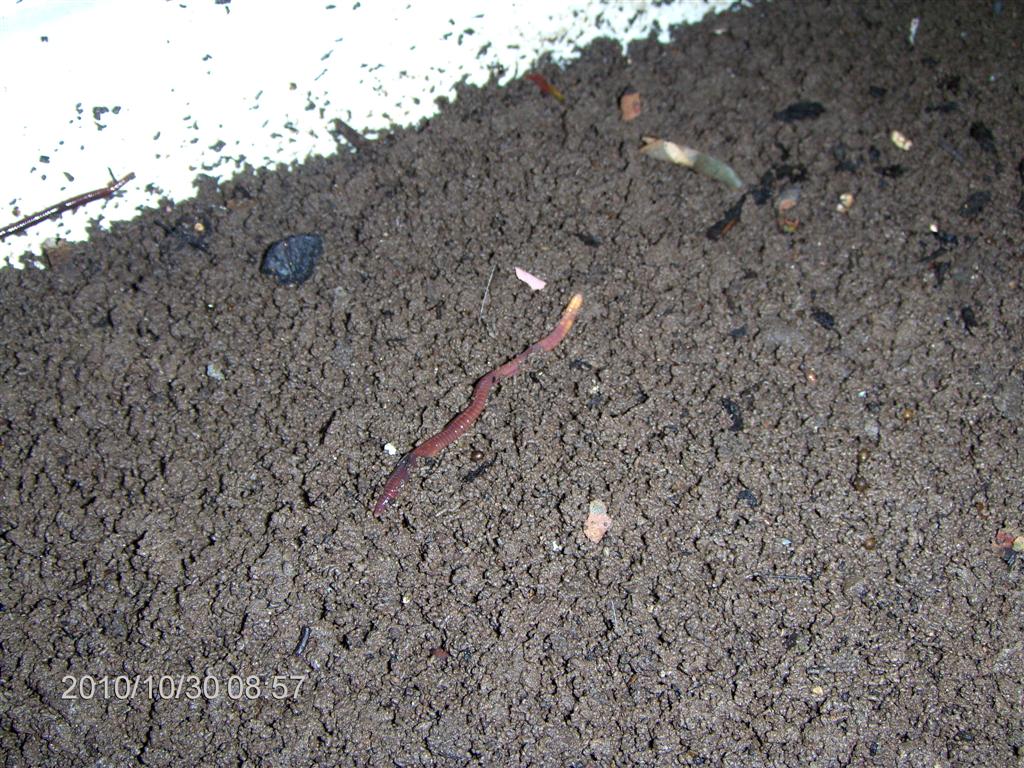
Here is a close-up shot of healthy Bertie worm inspecting the upper surface.
Alfie is escaping off to the left.
The clayey-soil is beautifully granular.
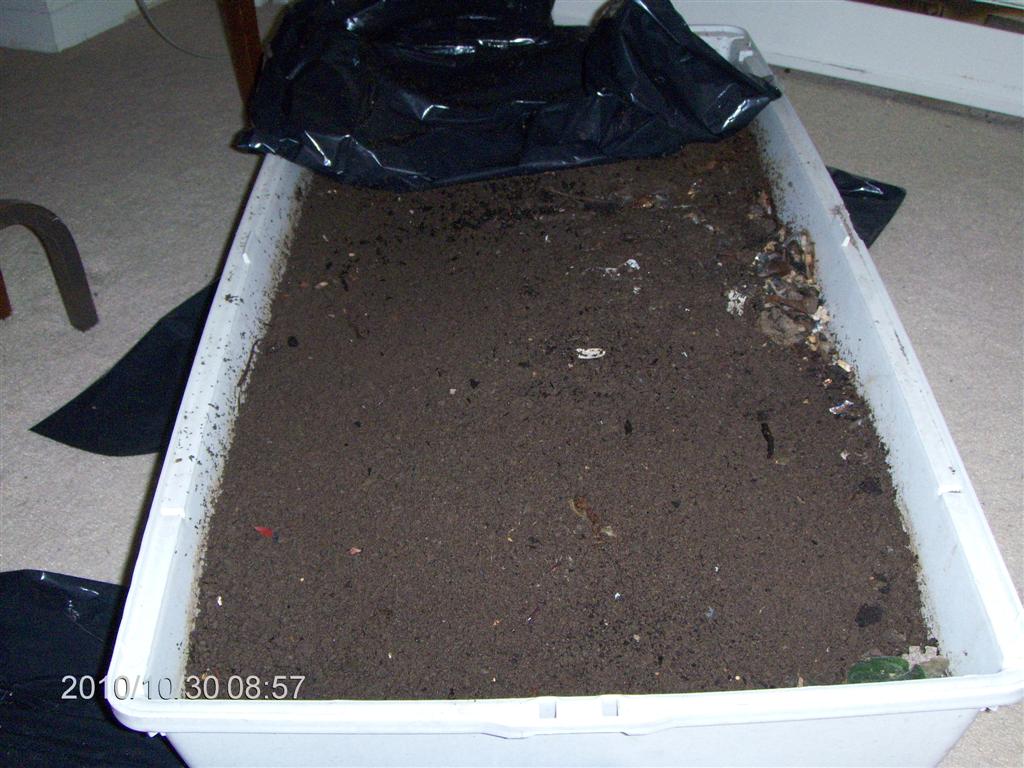
Here is a long-view of the tray with the black plastic cover removed.
Alfie can be seen crawling along the left-hand side. Bertie is visible, but only just in this view.
Tuesday, November 02, 2010

So, when is the first frost due this year?
Round about now!
Millwood Park was covered with a patina of frost-like dew this morning.
Monday, December 27, 2010
The bag-of-bones experiment
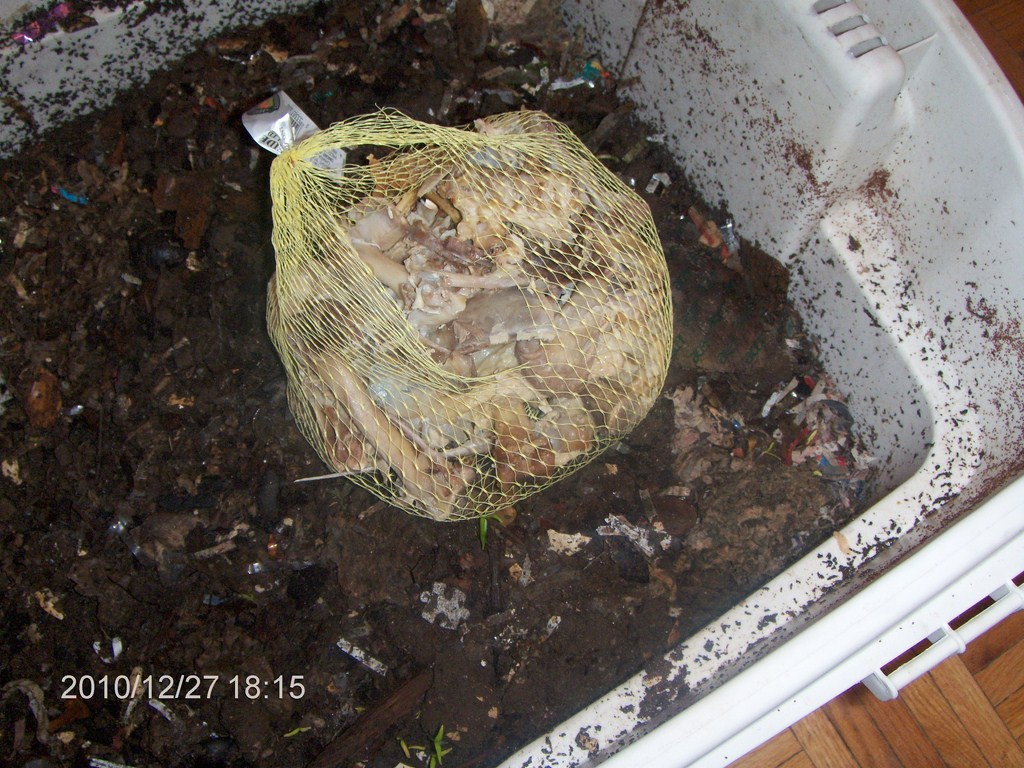
Christmas is come and gone, and my friend has dropped by with what’s left of a turkey.
Lots of turkey. I made eight tubs of soup and a large container of flesh.
I rubbed flesh off the bones and popped them into a nylon string bag that once held onions.
I scrape a hole in one corner of my tub and drop the bag.
I cover the bag with matter, but have kept the white paper label above ground so I can see where I buried the bag!
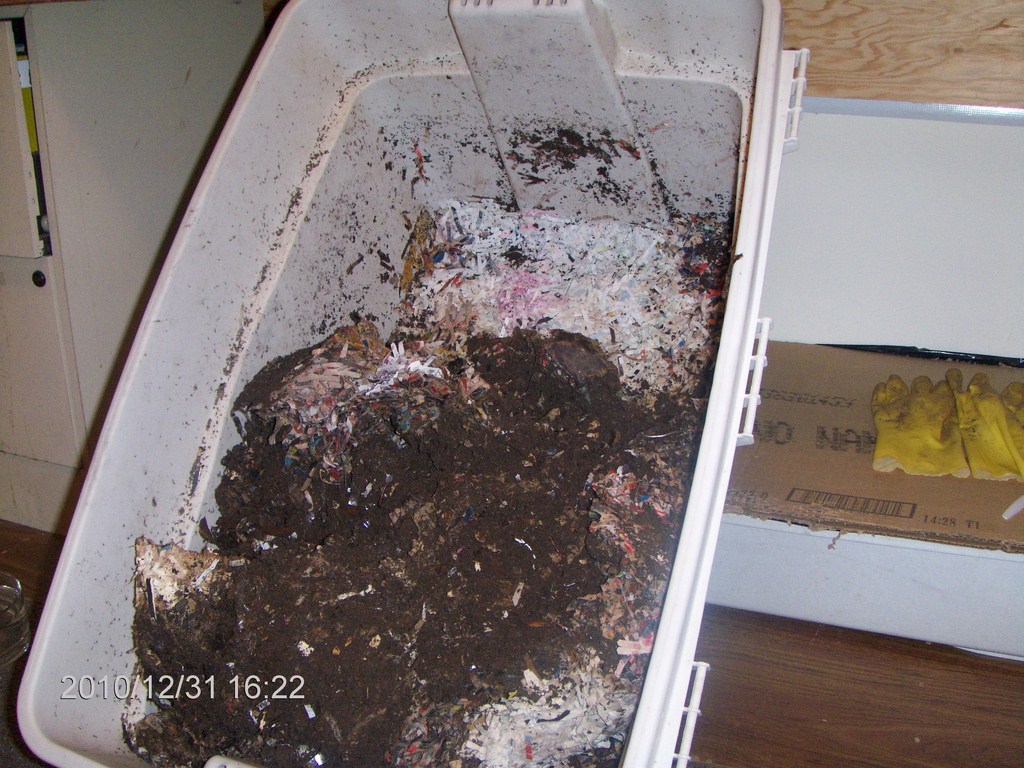
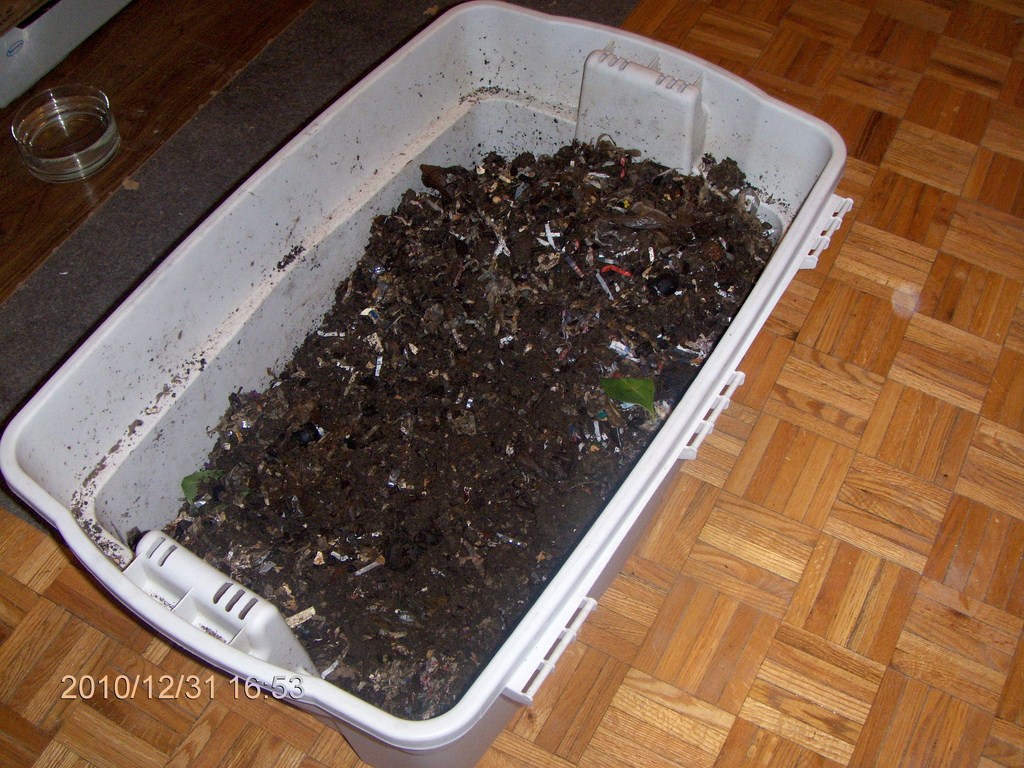
Friday, December 31, 2010
My 10-inch tub was getting full. Since today was a thaw (8c outside) I decided to add the contents to the large tub:
I rested the tub at an angle against the table, and rolled the upper layer to the bottom, temporarily covering my bag-of-bones experiment.
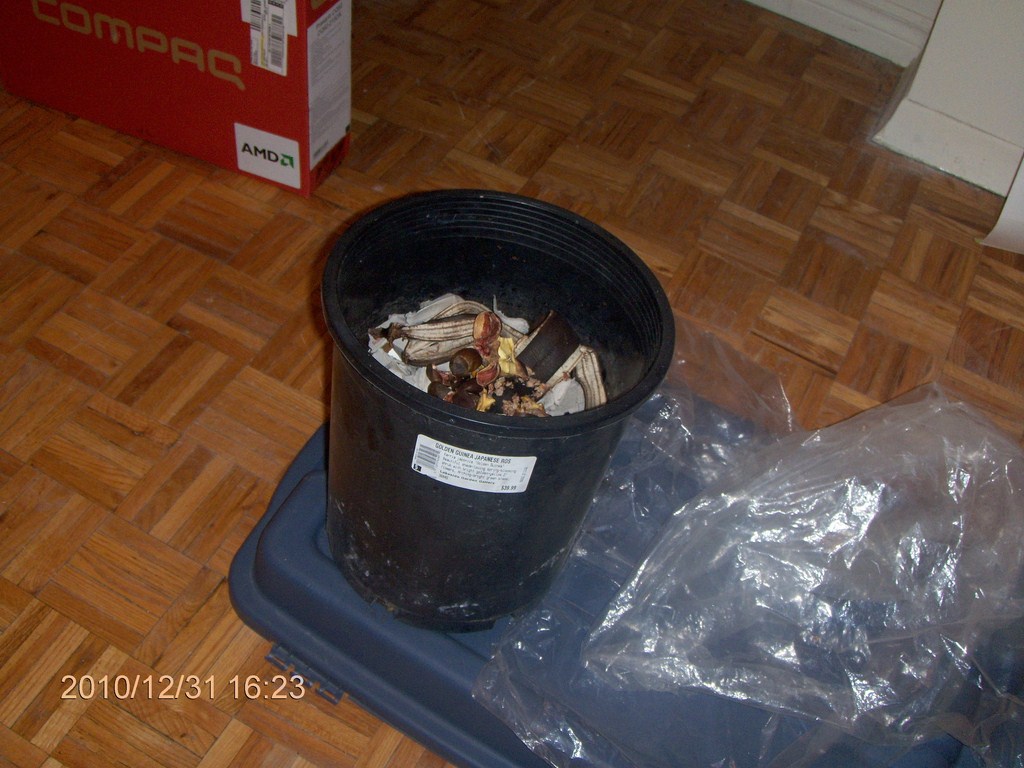
Here is my tub of scraps; I generate little green waste, this tub represents about two months scraps. Total.
Hooray for soups, eh?
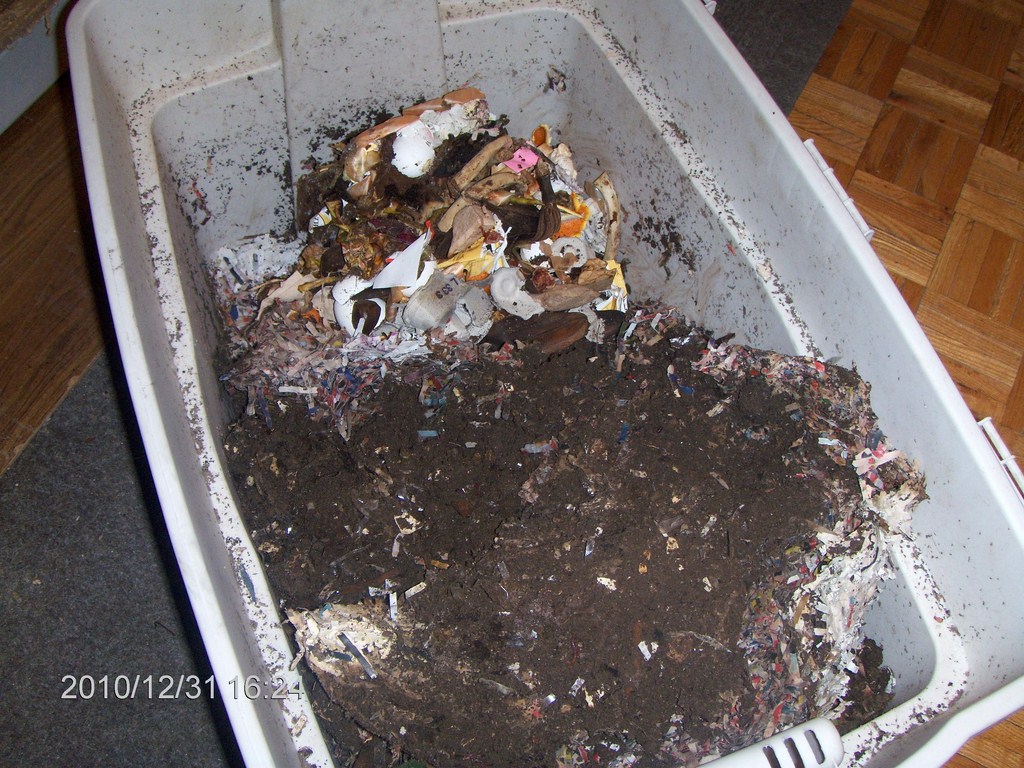
Here the tub contents are tipped into the large tub.
The scraps are sitting on a layer of moist paper about one inch thick.
With rubber gloves I spread the scraps across the width of the tub and “roll” that upper layer back, covering my scraps.
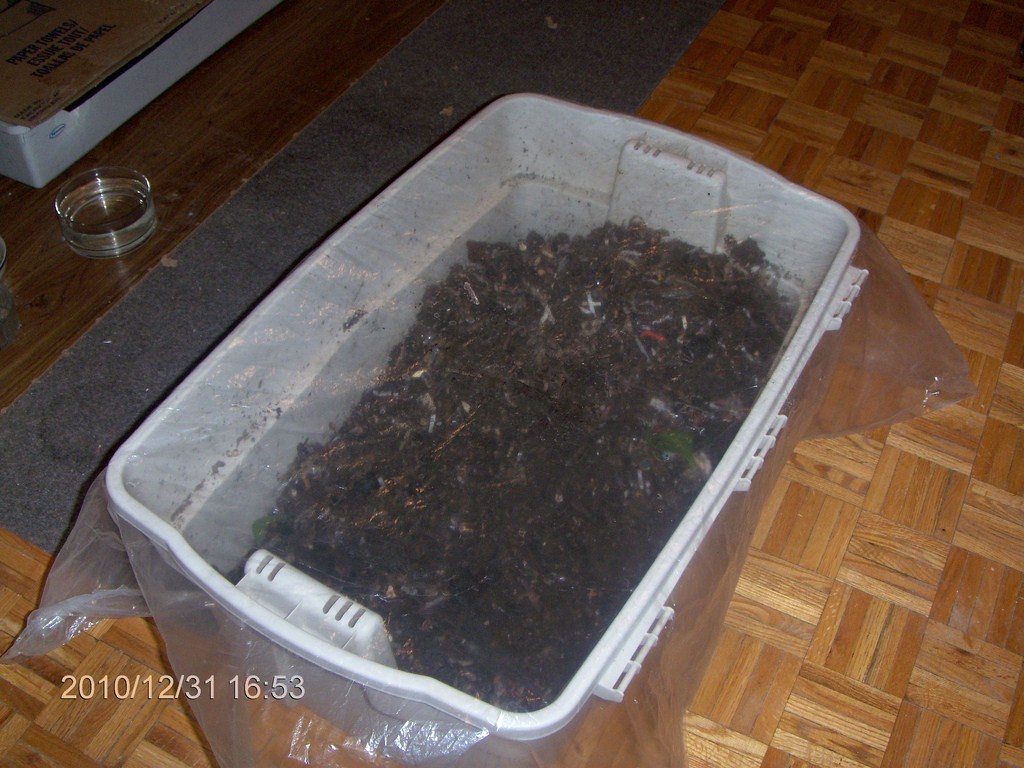
The soil seemed a bit dry, so I added about three liters of tap water, and have draped a dry-cleaning bag over the tub to check the moisture content.
I anticipate that the scraps will generate a bit of heat, and that the worms will migrate to the bag-of-bones end for a week or so.
By adding the scraps to one end I hope to avoid having the worms escape the tub en masse.
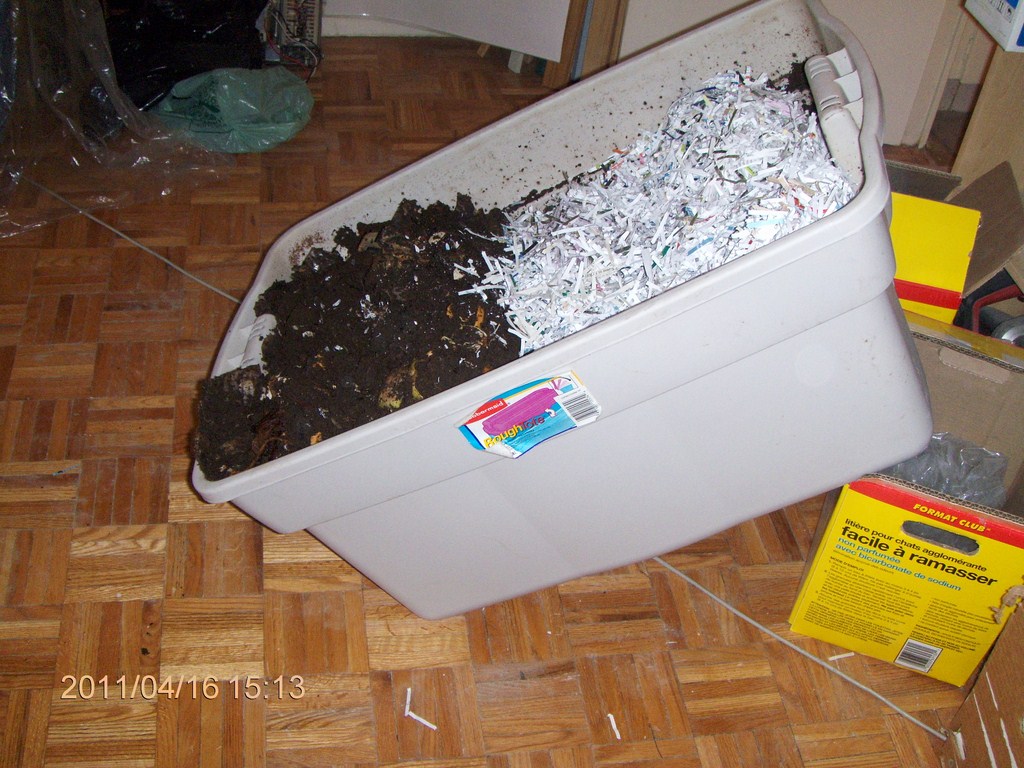
Saturday, April 16, 2011
This seems to be a year-round exercise, doesn’t it?
Last weekend I completed sieving the castings from the previous year and carted about 50Kg to my friend Joan around the corner; Joan’s flowers delight me each time I walk or bicycle or drive past there, so I am being VERY selfish here.
Yesterday I started re-stocking the large indoor bin with paper I shredded last weekend.
I dumped the shredded paper – about 6 cubic feet of it - into the hamster tray.
I tipped the indoor bin at an angle and with rubber-gloved hands scraped the contents to one end, leaving half the bin empty.
Into the empty half I dumped half the shredded paper, packed it down (dry!) and scraped some of the material over it.
This afternoon I repeated the process for the other end of the indoor bin:-
Above you can see the bin, one end resting on a kitty-litter carton. Half the composting material is scraped to one end and the remaining half of my shredded paper has been dumped in the empty space.
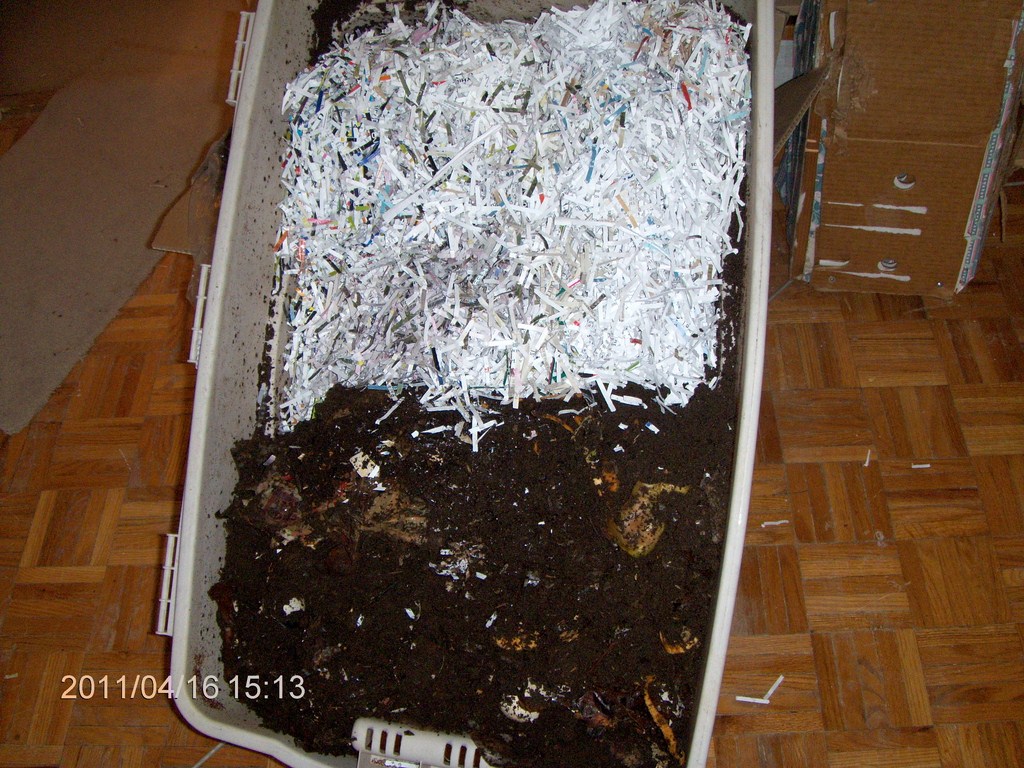
Here is a view head-on, so to speak.
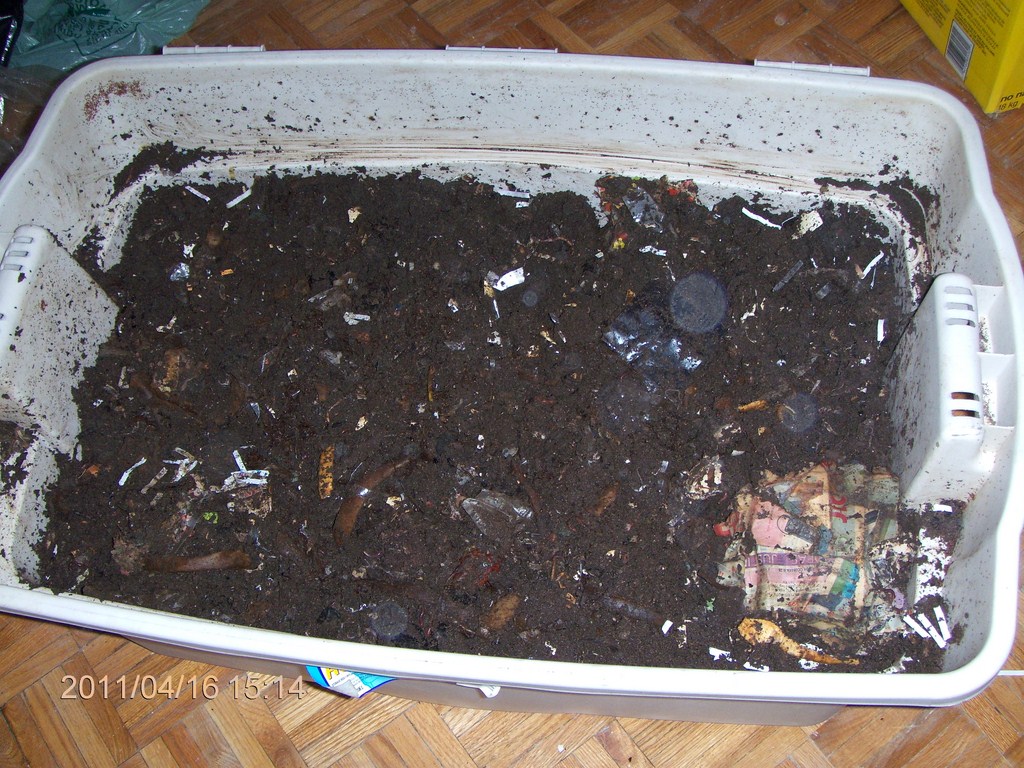
The bin is laid flat. I tamp down the shredded paper to squeeze some air out of it, then I scrape a covering of material over the fresh paper.
My indoor bin now has a thick layer of dry shredded paper as a base. That paper will absorb moisture from the wet clay-like castings above it.
The material fills the bin to a rim or ledge that runs below the top of the bin.
Here is the hamster tray, waiting to receive the first batch of this year’s sievings in about six weeks time.
Sunday, April 24, 2011
A week has passed …
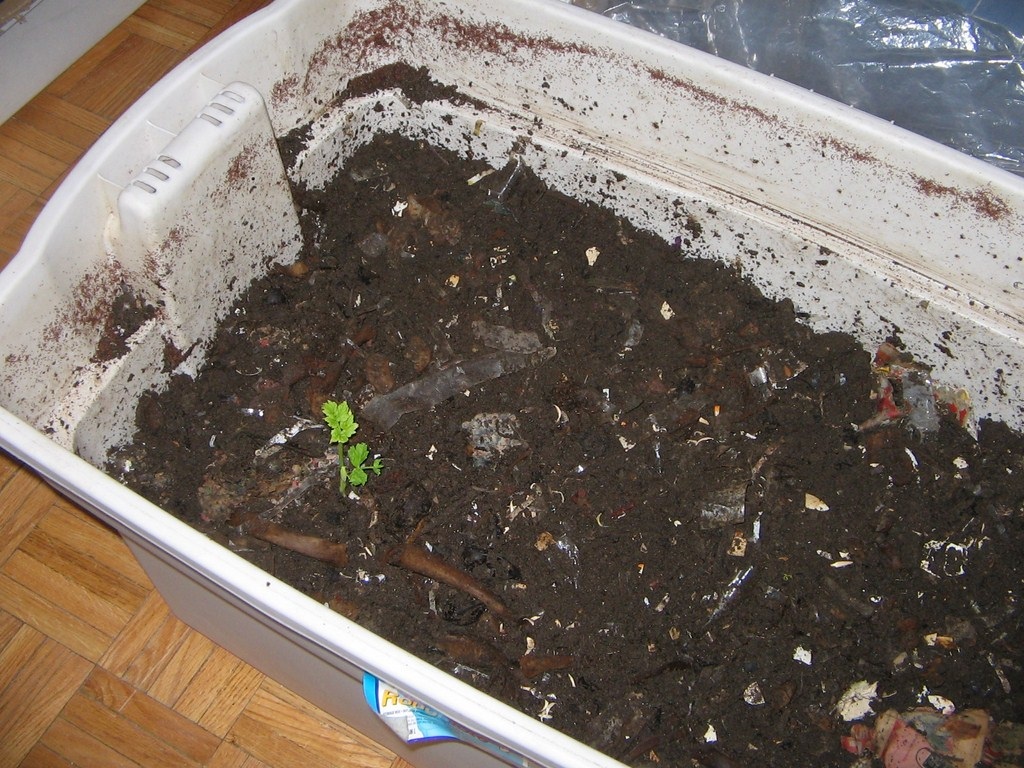
Note that the level of material has dropped well below the rim of the bin.
The paper material has compressed about 3 inches over the past 8 days.
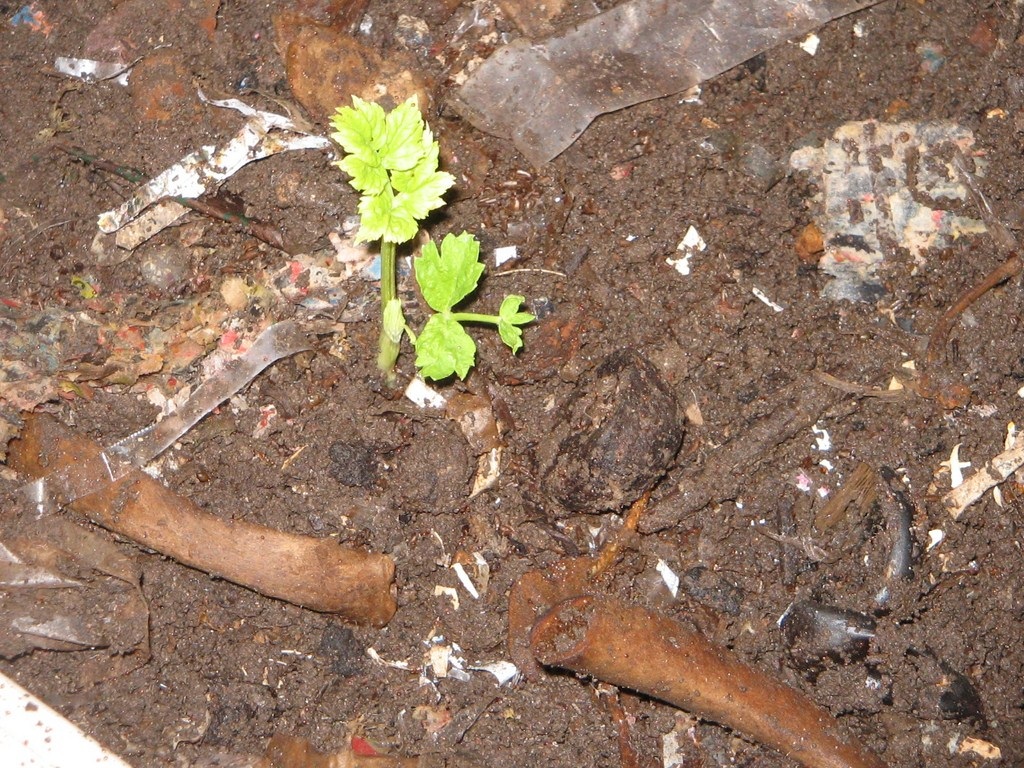
And a parsnip top has sprouted.
Doubtless a top tossed into the vermicomposter from last weekend’s bout of soup-making.
How sweet to have this brave little harbinger of life in my apartment!
Loading
709 218 7927 CPRGreaves@gmail.com
Bonavista, Wednesday, June 03, 2020 11:27 AM
Copyright © 1996-2020 Chris Greaves. All Rights Reserved.